red flannel pantry

creative pursuits in the kitchen, garden, library and sewing room

Archive for the category “craft projects”

lunch bag–oilcloth vs laminated cotton

IMG_4312

Daughter #2 has been hinting the past few weeks that she’d really like a new lunch bag. Her old one, which I made 6 or 7 years ago, had become beaten up, with the edges peeling off.

IMG_4294

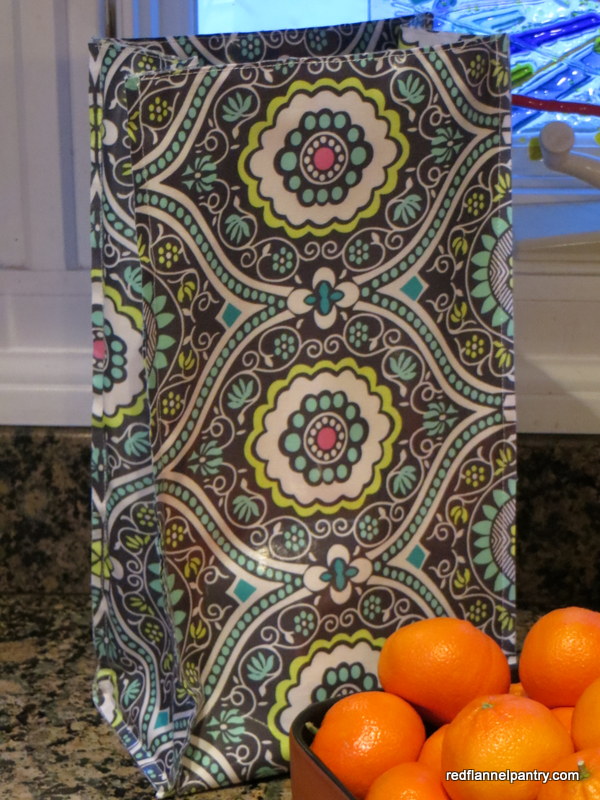
I looked back through my files for the original tutorial from 2007, found some oilcloth in my stash, and made this one. Cute as can be but  . . .

. . . something made me look up oilcloth, and I learned that it contains phthalates (scary, scary stuff) and is now considered not food safe–yikes. This information was not available when I made the first one–sigh. So after doing more research, I decided to make yet another lunch bag, this time from laminated cotton, which is PVC free, BPA free, lead free, and Consumer Product Safety Improvement Act (CPSIA) compliant. You can read how oilcloth and laminated cotton compare here.

Since the edges of laminated cotton, like those of oilcloth, do not fray, I opted to use the same lunch bag pattern. There are lots of clever designs for lunch bags out there. I showed several to D#2, but she insisted on the same exact one (but no Velcro please!).

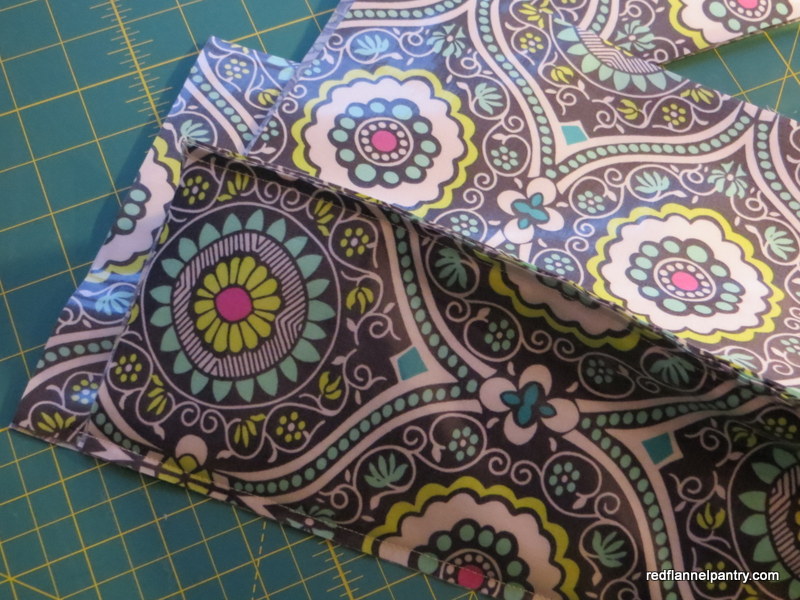
I found some pretty Amy Butler laminated cotton at the fabric store. Laminated cotton has a soft drape compared to oilcloth. I put Insul-Brite batting between the layers to provide insulation and add some structure to the bag.

IMG_4305

Clover Wonder clips, which weren’t around when I made her first lunch bag back in 2007, hold layers together tightly without creating holes like pins would.

IMG_4307

When making both bags, I found that after I sewed the first side panel to the main panel, I was left with exactly 1 inch extra at the top. (Is the pattern for the main panel off an inch or are my sewing abilities at fault?–a mystery.) I carefully cut it off using a ruler and rotary cutter and then sewed the other side panel in place, which fit just fine.

There’s a helpful post at Pink Chalk Studio about sewing with laminated cotton, and Debbie at A Quilter’s Table has a post about oilcloth pillows and then offers a bunch of links related to laminated cotton and oilcloth sewing tips and projects. I used a regular walking foot and regular needle to make both bags, although I should have probably used a denim needle when sewing the oilcloth. I also used a slightly longer stitch length. If I were to sew with this stuff regularly, I would consider investing in a Teflon foot. When sewing, I found the laminated cotton less “sticky” than the oilcloth.

Now, what should I do with the rest of my oilcloth? I like this bunting idea and this one. I enjoyed sewing with the laminated cotton–I could see using it for chair cushions, a double-sided picnic blanket, or tote bags.

getting a grip

IMG_4200

Lori Kennedy, of The Inbox Jaunt, is presenting a quilt notebook series to offer help in taking control of unfinished projects. I’m guilty of starting more projects than I finish, so in channeling Lori’s message, I set my most recent unfinished projects on my sewing table and have begun knocking them out.

IMG_4210

I had meant to make a pile of these suitcase handle wraps as stocking stuffers, but I succeeded in getting only one finished in time for Christmas as a gift for my daughter. That’s what happens when I dish too much on my pre-holiday gifts-to-make plate.

I thought today I’d sew the rest that I had cut out. I always feel silly when the task I put off takes so little time to complete–and indeed, this batch took me less than an hour to finish up.

Now that I have a feel-good mini-finish, it’s on to the next.

photo memory ornaments

IMG_3701

Daughter #2 and her friends are celebrating the holidays and the end of finals (woohoo!) with a secret Santa gift exchange and dinner out tonight. We thought it would be fun to have a little gift for all of the girls, so Daughter #1 joined us in making these photo keepsakes. They can be Christmas tree ornaments or decorations on a bulletin board.

We manipulated the photos on the computer (cropped them and made black and white or sepia) and then printed them out wallet size on cardstock. We trimmed them up and glued them to colored cardstock to make a frame.

IMG_3702

I printed little stickers with the date and attached them to the back. We then laminated them in sheets, cut them out, punched holes and added ribbons.

There you go–a quick, inexpensive, personalized homemade gift that celebrates friendships and memories.

aiming for divestment nirvana

Like many of our friends, my husband and I are trying to help elderly parents downsize both their home and possessions. This on-going experience, in turn, has made us more aware of our own belongings. We now ask ourselves often, “Why are we holding onto that?”

I have begun to make a deliberate effort to ask that question when I am in my sewing room and to be open to ways to divest. As someone who has been sewing and creating for over 35 years, I have an embarrassingly large amount of unfinished projects, underutilized supplies and extra material. Rather than throw anything away, my aim is to gift it to someone who truly wants it and can use it. For the recipient, it’s free; for me, it’s freeing.

photo (29)

A few months ago I sorted through my fabric, pulling out what I knew I would never use. I contacted the home economics teacher at the middle school, who said she would be delighted to have it. I am happy that the fabric is being used to help teach a new generation to sew. My plan is to make this culling a yearly exercise–hopefully it will make me more mindful in terms of future purchases and remind me of what I already have.

IMG_2912

Several years ago, an interior designer friend, knowing that I sew, asked if I would like some outdated upholstery fabric samples. I sorted them by color, stashed them in bins, and used them from time to time. However, these bins were taking up precious storage space and I was not using the material like I thought I would. I was loath to throw it away, so I hung onto it. Then a few weeks ago I read a story in our local paper about a young woman with special needs who sews pillows from upholstery sample fabric and sells them on Etsy–yippee! I contacted her mother who was thrilled to receive “new” fabric for her daughter to use. (You can see Holly’s Etsy website here.)

A couple of weeks ago, I had dinner with Jean, an old college roommate. She’s a talented, creative sort, and like me she was plagued with unfinished projects that she could not bear to discard but knew she would never return to. Jean shared with me her guilt-free divestment technique: in a large Ziploc bag, she packs up each unfinished project along with the remaining coordinated supplies, directions, and a note explaining the history of the project, what has been completed, and what remains to be done to finish it. She then donates it to Goodwill, with the idea that someone might find it interesting and “new” enough to take it on as their own and complete it. Brilliant! I follow Tim Latimer’s blog, and I get a vicarious thrill when he rescues an old quilt top via e-Bay or a flea market, repairs it, and brings it to life.

IMG_3077

And then this week, Daughter #1 told me how one evening a week she is hanging out with the knitting group at her college despite not knowing how to knit herself (knitters do make awfully good company!). I have tried to learn to knit through the years and have made valiant efforts under the guidance of patient and loving friends/teachers. Although I am a capable crocheter (in my teens I learned to crochet right handed), alas, I have never been able to master knitting. It could be my left-handedness or perhaps my desire is just not strong enough. At any rate, the lovely needles, yarn and half-finished projects have taunted me long enough–I have packed them up with a care package for D#1. Perhaps this is her chance to learn to knit–as a right-hander and a creative soul, maybe she’ll have better luck.

tie-dying American style

IMG_2639

With our European friends in town and the weather sunny and unseasonably cool, we decided it was a great time for our annual tie-dye extravaganza. Ursula had never tie-dyed before, and the last time Maia had tie-dyed was with us when she visited 3 years ago.

IMG_2616

We got out folding tables and old doors on sawhorses and taped down large, cut-open trash bags on top. We then covered that with old tablecloths. The tablecloths absorbed the excess dye that would have otherwise pooled on the plastic. A box of latex gloves were on hand for those who didn’t want to have stained, zombie-looking hands for the next week.

Through the year I buy and stockpile white items when I find them on sale: t-shirts, underwear, athletic socks, boxers, bandanas. White or gray t-shirts with logos work well too. Using the school colors, D#2 tie-dyed a white t-shirt printed with her high school logo.

Jacquard, the make of Procion dyes, provides a thorough set of instructions for tie-dying.  Another source of Procion dyes and tie-dying info and supplies is Dharma Trading.

Although all of the instructions say you need to prewash items, a tie-dye pro once told me this was unnecessary–he was right. So now I never prewash stuff. However, you do need to soak items in soda ash fixer (sodium carbonate) before you begin.

IMG_2619

After we folded, rubber-banded and dyed, we laid things out on cardboard, which absorbs the excess dye. In the past, the kids were so anxious to see their finished items that we would undo and rinse out everything a few hours later. This time, now that they are older and understand the concept of delayed gratification (a little bit?!), we convinced them that they really would get much better results if they waited til the next day. (I found take-home instructions  I will use the next time we tie-dye so people know what to do if they want to take their stuff home before rinsing.)

IMG_2633

My husband enjoyed embellishing the tablecloths with the leftover dye.

IMG_2647-002

The next day was the big reveal! We removed the rubber bands, filled a series of bins with water, and then rinsed the items repeatedly to remove the excess dye.

2013-07-30

At the top left, you can see how I swirled the t-shirt into a twist, secured it with rubber bands, and dyed it. Top right, the end result. The boxers are the work of D#2–we like the blue butt cheeks!

IMG_2641

We replenished our tie-dyed clothing stock, initiated Ursula into the fine art of tie-dying and had a wonderful weekend!

Post Navigation

Butterfly Gardening

Learn how to attract butterflies to your garden

It's Not Work, It's Gardening!

creative pursuits in the kitchen, garden, library and sewing room

twin fibers

creative pursuits in the kitchen, garden, library and sewing room

NW Quilted Cat

Longarm Quilting, Patterns, Foundation Paper Piecing Teacher

Momotaro Makes

creative pursuits in the kitchen, garden, library and sewing room

Snoop's Theatre Thoughts

A longtime fan's look at theatre in St. Louis, MO and Beyond

Momoe's Cupboard

Low Budget Meals and Ideas

Wedding Dress Blue

Quilting and other things I love in this colorful world

Sew Me

creative pursuits in the kitchen, garden, library and sewing room

Simplify

creative pursuits in the kitchen, garden, library and sewing room

Letter from Mekelle

Lewis and Helen's Adventures in Ethiopia

Just Jude

creative pursuits in the kitchen, garden, library and sewing room

Entropy Always Wins

entropyalwayswinsblog.com

jmn

Creative Endeavours

Sew Mama Sew

creative pursuits in the kitchen, garden, library and sewing room

quiltingquandary

Smile! You’re at the best WordPress.com site ever

Elven Garden Quilts

creative pursuits in the kitchen, garden, library and sewing room

Christine Doyle

Freelance Editor + Passionate Crafter

Sew Kind Of Wonderful

creative pursuits in the kitchen, garden, library and sewing room

Darlington Delights

Welcome to Darlington

The Simple Seamstress

Adventures into the great unsewn.

K&S Design Girls

creative pursuits in the kitchen, garden, library and sewing room

OccasionalPiece--Quilt!

OPQuilt: Quilts & Textiles